|
|
|
The deployment can be divided into three major phases: database deployment, client installation, and post-installation configuration.
Database Deployment
The default behavior for the setup application is to create a new database on SQL Server 2008 or higher in the default database location as defined on SQL Server. If you would like more control over the database design, layout, or storage location you may create a blank database in SQL Server prior to running the setup application. If you create your own database, ensure that the user performing the application installation has db_owner access to the database during installation to populate the necessary schema objects. During installation a SQL Standard login will be created by the setup application. You may disable this login after the installation is complete if you wish to use Windows integrated security.
Client Installation
To perform an installation of pasUnity you must be logged on to the machine where the pasUnity agents and UI will be installed with administrative access. If you are running on a machine that includes the Windows User Access Control (UAC) it is recommended that you run the installation program as an administrator. Follow the steps below to install pasUnity:
•If a prior version of the application is already installed it must be removed before a new version is installed.
•The pasUnity web service and database connectivity settings are stored in the pasUnityClient.exe.config file in the application folder - you should back this file up before uninstalling or upgrading.
•The pasUnity system configuration settings and object definitions are stored in the database and will not be lost by uninstalling the application.
•Navigate to the media installation folder and run the pasUnity.msi application installation program.
•You must accept the license agreement to complete the installation.
•The default installation folder for pasUnity is in the 32-bit program file folder: %PROGRAMFILES%\PAS\pasUnity
•Approximately 10MB of storage is required.
•After installation the pasUnity Windows Service will be set to automatic startup but will not start until either the system is restarted or the services are manually started - this give you a chance to configure and license them before first use.
•When you launch pasUnity for the first time you may receive an error message dialog similar to that pictured below for any of the following reasons:
•The pasUnity database has not been created.
•The pasUnity database exists but has an old version number.
•The database connection string in the application configuration file is incorrect.
•Your logon does not have access to the pasUnity database.
•The pasUnity Connection Security has not been configured.
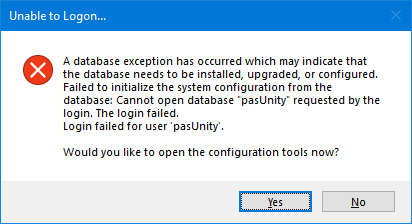
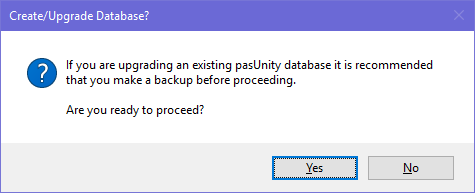
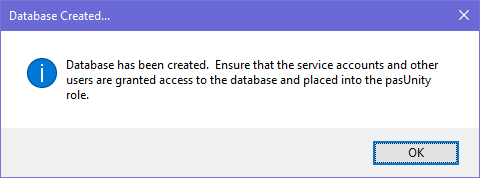
•If the pasUnity database does not yet exist you will be prompted to open the Database Configuration tools where you must specify a destination SQL Server instance to install the database on and the credentials of a user with system administrator privileges on the SQL Server instance to perform the installation. Click Install to create or update the database. Upon completion you will receive a confirmation that the database has been created or upgraded appropriately and you may then connect and continue.
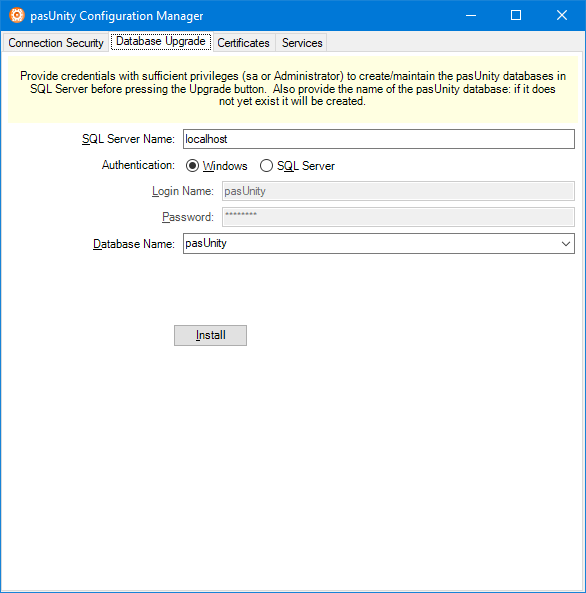
•You will be prompted for server name of the SQL Server where the database resides or will be created and the name of the database itself. The server can be a standalone server, named instance, or a clustered instance.
•You will be prompted for the name of the database. The default is pasUnity. If the database exists, the installer will populate/upgrade the schema in that database. If it does not exist a new database will be created.
•You will be prompted for the name and password of the default login that the pasUnity services and UI will use to connect to the database. The default user name is pasUnity and the default password is P@ssw0rd and if you wish to change either you must manually create your SQL Server login AFTER the setup program has created the database for you and place it in the Services role in the SQL Database. If you wish to use integrated security you may leave these fields blank. CAUTION: by default, the pasUnity services run as LOCALSYSTEM and will not be able to access the database using integrated security unless this is changed post-installation or unless the machine account is granted access to the database and placed in the Services database role.
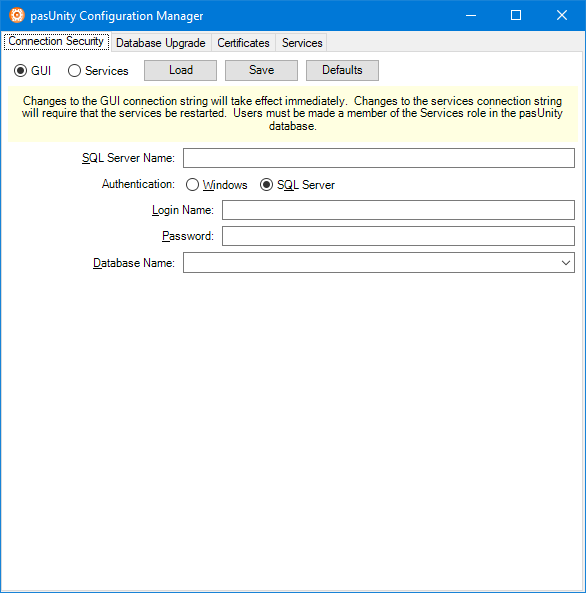
•In the event that you are unable to connect to the database and you are certain that the database exists and you have access to it the problem may just be that you need to configure the connection strings. To do so navigate to the Connection Security tab. There are two connection strings that get used - one is for end users and the other is for the services. Select GUI and click Load to populate the default settings. You may then make changes to the existing settings and press Save to store them to the configuration file. The default settings are pictured below. The most frequent deviation in settings is to change the SQL Server Name to a network location. After saving the GUI settings select Services and repeat the process.
•You will be prompted for server name of the SQL Server where the database resides or will be created and the name of the database itself. The server can be a standalone server, named instance, or a clustered instance.
•You will be prompted for the name of the database. The default is pasUnity.
•You will be prompted for the name and password of the default login that the pasUnity services and UI will use to connect to the database. The default user name is pasUnity and the default password is P@ssw0rd.
Activation
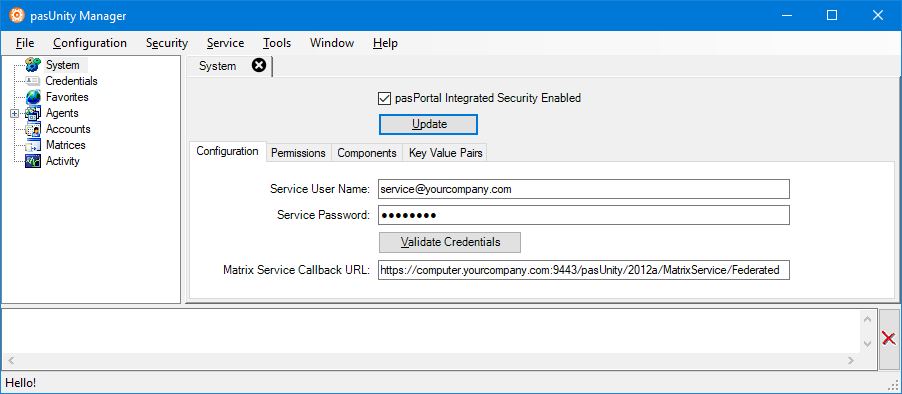
•After installation completes you must activate your copy of pasUnity and then start the service from within the pasUnity UI from the Start Menu. First open pasUnity as shown below.
•From the Help menu choose Licensing... to activate your license. For details on installing and managing licenses see the Licensing topic.
•Once pasUnity services have been licensed you may start the services from the Service menu within the pasUnity UI.
•All services are always installed whether they are used or not.
•The default behavior is to not start those services previously set for automatic startup at the end of the installation routine. This is because you will likely need to open the user interface and complete licensing the application unless this is an upgrade. If you choose not to start these services immediately to carry out further configuration you will still be able to easily start the services from the pasUnity UI after setup has completed.
•Each service consumes on average less than 20MB of RAM and utilizes very little CPU but you may still wish to disable automatic startup on certain services.
•The pasUnity Collector Agent needs to be running in order to automatically read email from POP3 message stores and store them in the pasUnity database and trigger job execution.
•The pasUnity Event Reader Agent needs to be running and enabled in order to intercept event in the Windows event log.
•The pasUnity File Transfer Agent needs to be running and enabled in order to interact with content in a matrix using the FTP or FTPS protocols.
•The pasUnity Processor Agent needs to be running to in order to automatically execute jobs that have been queued for execution.
•The pasUnity Watcher Agent is used to trigger job execution in response to file system changes to monitored folders and file patterns.
•The pasUnity Payload Agent is used to host the pasUnity web services independently of an external web server, such as IIS or Tomcat.
•Installation and Activation are now complete and you may begin using the application features.
Copyright © 2025 pasUNITY, Inc.
Send comments on this topic.