|
|
|
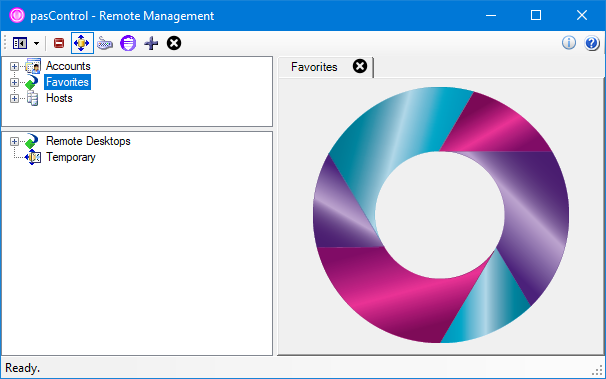
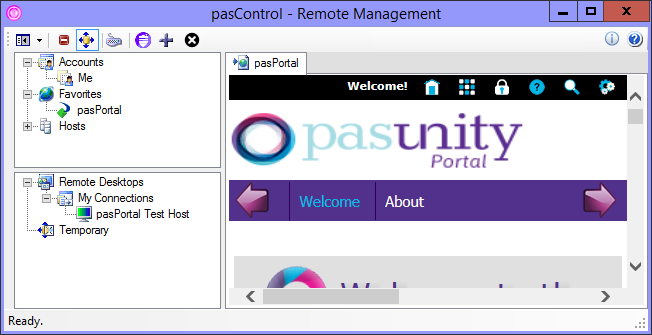
Upon opening pasControl for the first time (or anytime that the interface has not yet been fully configured) you will be presented with the user interface as shown here and this help file which will launch to help you complete your configuration.
The default interface looks like this:
Begin by setting your preferences on the toolbar. The current set of preferences are applied every time a new persistent or ad-hoc connection is created as default that you may later override. Changes made here will be retained after you close the application.
![]()
In the example above the options for administrative session, auto-size connections, and high-performance sessions have been enabled as indicated by the outline around their respective icons.
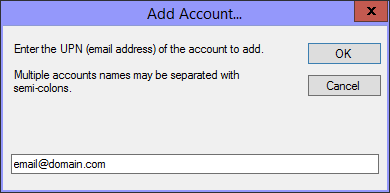
Now we must configure our account list. Select and right-click the Accounts node and choose the Add New Account... option. You will be presented with a dialog box where you may enter your account using either UPN or distinguished name syntax. In this example I will use UPN syntax.
You may now rename your account's friendly name and set a password and press Save.
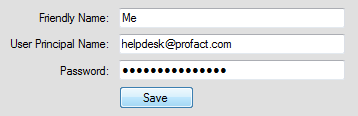
This account may now be used in connecting to Remote Desktop sessions.
The next task is to define URL favorite entries for any systems you wish to reference. Select and right-click the Favorites node and choose the Add New Favorite... option. You will be presented with a dialog box where you may enter the URL of the resource you wish to access as shown below:
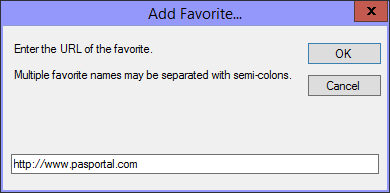
It is important that your URL contain the protocol (in this example that is HTTP://). You may now configure the URL with a friendly caption and tooltip as shown and press Save.

Test your favorite by clicking on it from the upper navigation pane as shown:
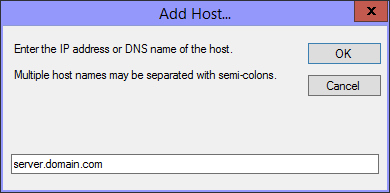
Now we will configure host entries for hosts that we wish to connect to using Remote Desktop or monitor using ICMP Ping. Select and right-click the Hosts node and choose the Add New Host... option. You will be presented with a dialog box where you may enter the IP address, DNS name, or NETBIOS name of the host as shown below (use the name of a machine that YOU have access to and not the one shown in the example):
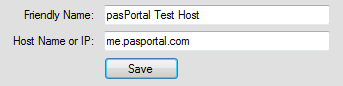
In this example I will be connecting to a machine using a DNS name. Give your host a friendly name and click Save.
To test availability to the host you may select and right-click the host entry in the upper navigation pane and choose the Toggle Pinging... option. If the host that you configured in available and the ICMP Ping protocol is not being blocked you should have a green gear icon indicating that the server is available as shown below:
Use the Toggle Pinging... menu option again to turn this feature off.
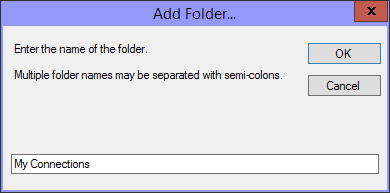
Now we must create a folder to organize our Remote Desktop Connections. Select and right-click the Remote Desktops node and choose the Add New Folder... option. You will be presented with a dialog box where you may enter the name of the folder as shown below:
Now that you have a folder created you will need to drag and drop a host entry from the Hosts node in the upper navigation pane onto the folder you just created in the lower navigation pane. To do this expand the list of hosts in the upper navigation pane and click on the host you wish to create a connection for. Now click (but do not let go) of the left mouse button and drag the host entry over the newly created folder in the lower navigation pane where the cursor should change to indicate that a drop is allowed. Release the left mouse button. A connection entry will be created which you must now configure:
You will note that the options shown above are all defaulted from the toolbar selections that we made previously. All that remains for you to do is provide the account that you wish to connect with and press Save.
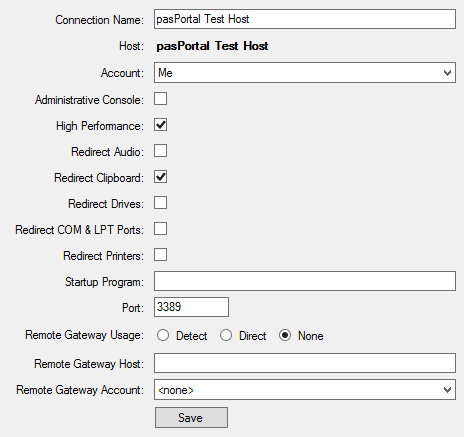
In the example above you can see that I choose the Me account and also checked the box to redirect printers.
To test the connection, locate and select the icon for the connection for the lower navigation pane as shown below:
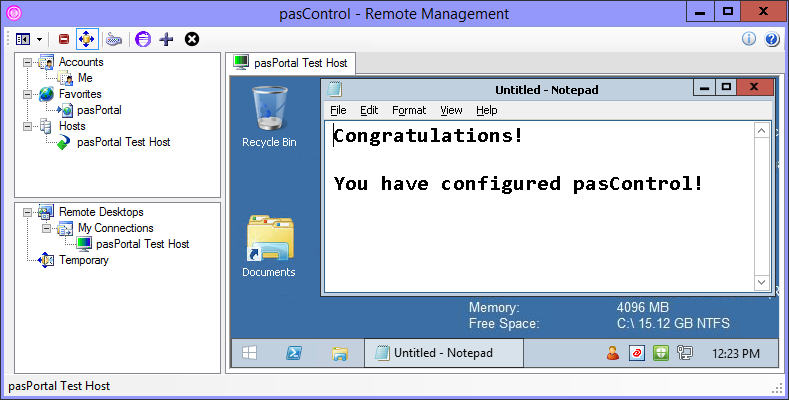
You have now seen how to use the basic features of pasControl. Feel free to explore this help file further to find out about the other things you can do!
Copyright © 2025 pasUNITY, Inc.
Send comments on this topic.